Whether you want to use different signatures for your internal and external emails, or prefer a shorter signature for replies and forwards, it's possible to create multiple signatures in Gmail.
In this guide, we explain how to do it in a few simple steps, while maintaining a conversational and engaging tone.
Step-by-step guide to creating multiple signatures in Gmail
Access Gmail settings
- Open Gmail and click on the gear icon in the top right-hand corner to access "Settings".
- Select "View all settings" from the drop-down menu.

Create a new signature
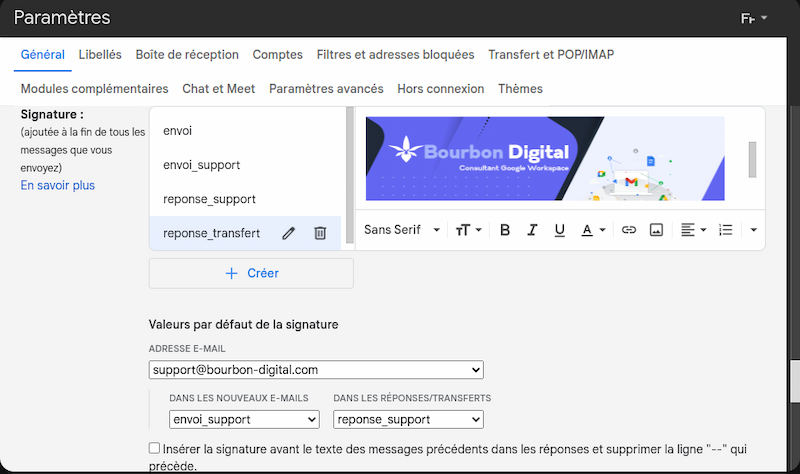
- In the "General" tab, scroll down to the "Signature" section.
- Click on "Create new" to add a new signature.
Give your signature a name for easy identification.
Compose your signature
- Use the available formatting tools to compose your signature.
You can add text, images, links and other elements according to your preferences.
Remember to include your name, title, company and contact information.
You could also add social network icons or a call to action. - Once you've created your signature, click on "Save changes" at the bottom of the page.
Add more signatures
To add other signatures, repeat steps 2 and 3.
You could create signatures for different purposes, such as a formal signature for new customers, a casual signature for colleagues, or a promotional signature for marketing campaigns.
Adapt your signatures for different types of email: new, reply and forwarded emails
Select different signatures for different types of email
- In the "Signature" section of the settings, select the desired signature for new emails, replies and forwards from the corresponding drop-down menus.
- Click on "Save changes" at the bottom of the page.
Quickly change signature when writing an email
- In an email editor window, click on the pen icon at bottom right.
- Choose the signature you wish to use from the drop-down menu.
This makes it easy to select the right signature for the recipient and the context.
Summary
Creating and managing multiple signatures in Gmail is simple and convenient.
By following these steps, you can personalize your emails to suit your needs, while enhancing your professionalism and efficiency in your communications.
Take advantage of this feature to make your emails more engaging and effective.


